bulkWaterMark turns 1 today and we have just released a new version of bulkWaterMark with huge features! The first one I would like to introduce with this blog post is a powerful addition to the border images feature: Placeholders!
New: Frame Layer + Placeholders
Our August 2016 release introduced the Frame Layer to border photos fast with bulkWaterMark. The new Placeholders are an essential upgrade for the Frame Layer.
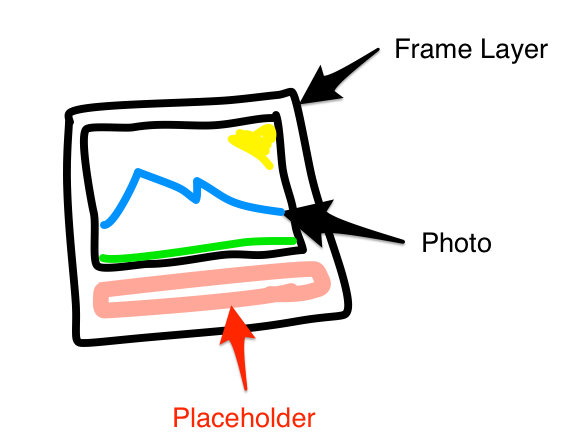
So what are Placeholders good for? Layers in bulkWaterMark can provide Placeholders that can be used to host Child Layers. Let’s say you want to add an image description and design a picture frame that looks like a Polaroid instant photo with handwritten text on it:
How to border images in Polaroid style
First you need to insert a new Frame Layer into your watermark template. I’m using the gradient brush tool to create a texture that makes the frame look like a sepia colored instant photo.

Now I’m increasing the thickness of the bottom border. I set it to 150 pixels to make it look like a typical instant photo. After resizing the bottom border, bulkWaterMark indicates that this part of Frame Layer can be used as a Placeholder for hosting another Layer:

The Placeholder is now ready to be filled with text. Click the “Add Text Layer” button and afterwards hit the light grey Placeholder area to insert the Text Layer into the Placeholder.

This new Text Layer is now dependent on its parent Layer in terms of position, size and visibility. If you disable the visibility of the Frame Layer, the Text Layer is also hidden. If a batch image resizes your Frame Layer, the description Text Layer gets resized and repositioned to. If you delete the Frame Layer, you delete the Text Layer. And so on…

I’m making a few adjustments to fit any text nicely into the Placeholder by setting the Font Size to Auto Size. Additionally, I’m aligning the content to the center of the Text Layer. Now you can use any input picture for watermarking and the Frame Layer positions the border around the image including the description Text Layer perfectly. Finally, I’m adding a soft drop shadow effect to the Frame Layer and rotating the whole watermark for a few degrees.
Choose image files for framing
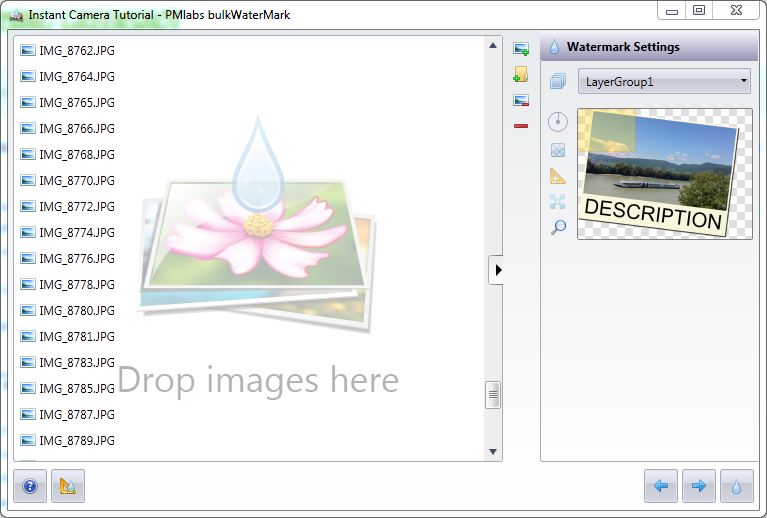
After saving the Profile, I’m in the Batch View to select a bunch of image files that should get decorated with a border.
Because I’m using the drop shadow effect, bulkWaterMark will generate a semi-transparent output picture. I would recommend to set an output image format like PNG, GIF or WebP to keep the semi-transparency for output files. (A feature that solves this problem is on the way!)
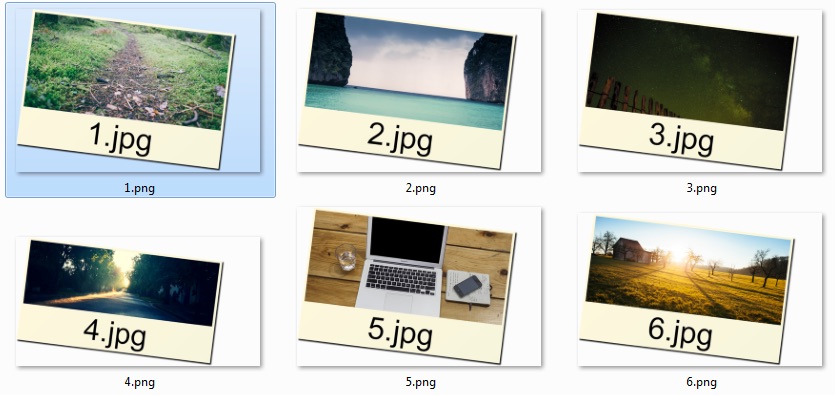
After clicking the Drop button, you can lean back and bulkWaterMark borders the selected images.
The Placeholder feature is available from bulkWaterMark Pro and can be tried out in our 30 days trial version.
In the next tutorial I will demonstrate how to replace our static “DESCRIPTION” text with dynamic data from a Microsoft Excel Workbook.
Thank you for your attention!
Cheers,
Phil