Since Apple dismissed it’s fabulous photo software Aperture, I started to look into Adobe’s alternative: Lightroom. I really like the photo editing capabilities and features of Lightroom a lot and I’m an avid fan of the software. Compared to our Photoshop watermarking tutorial a few weeks ago, Lightroom has a “real” built-in feature to watermark photos. In this article I would like to look into the photo watermarking functions of Lightroom and how they perform in contrast to bulkWaterMark or waterMark V2.
First of all, Lightroom does a very basic batch watermarking job compared to bulkWaterMark, but the integration in your photo editing workflow is a big plus here. As in bulkWaterMark or waterMark V2, Lightroom does also allow image and text watermarks for protecting your pictures. I’m using the latest version Adobe Lightroom CC 2015 in this tutorial on a Mac, but as usual: This should also work for older versions, since to watermark photos is not a new feature anymore. Also: Windows shortcuts and menu titles are the same as on the Mac, unless stated otherwise.
Watermark photos in Lightroom
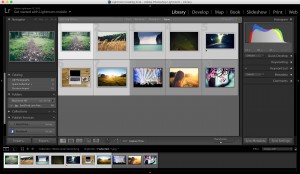
In Lightroom, you can watermark photos when exporting your photos. Therefore, I suggest selecting a few images in our library that we want to export and clicking the “File/Export…” menu entry.
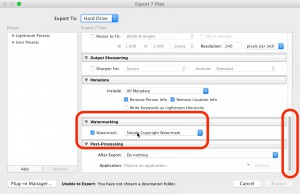
Afterwards, the export dialog pops up and displays several options for configuring your image output. Please choose your basic export settings like destination folder and output format as you need them – these settings are similar to bulkWaterMark’s watermark output settings. When you scroll down to the bottom, you will find a settings group called Watermarking. Open up the group, tick the check box “Watermark” and click the combo box to select the entry “Edit watermarks…”:
Now it’s getting interesting: Like the profile editor of bulkWaterMark, Lightroom opens a window called “Watermark Editor” that allows you to design your watermark.
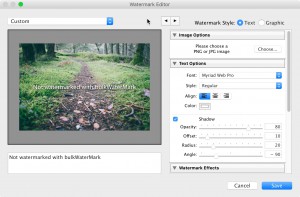
Lightroom’s Watermark Editor also has rudimental live editing features to change the size of your watermarks by dragging a text watermark’s edge, whereat bulkWaterMark features more detailed watermark composition possibilities comparable to the Adobe flagship product Photoshop.
The editor is split into multiple areas: Most of the dialog is filled with a preview canvas that displays one of your selected export pictures topped up with the watermark. The arrow buttons on the right top of the dialog let you browse through the photos to export and watermark.

Next to the arrows you can set your watermark style with two radio buttons. Lightroom supports either a text watermark with an optional image watermark or a pure image watermark. If you select “Graphic” then you have to define an image file for watermarking. And if you choose “Text” then you can define an image file for watermarking. So the only thing these radio buttons are doing, is enabling or limiting some of the available watermark options.
Right below the style radio buttons you will find the settings of your custom watermark grouped in multiple sections. As mentioned above, depending on what style you are choosing, you can either edit all watermark options (selection “Text”) or just “Image Options” and “Watermark Effects” (selection “Graphic”).
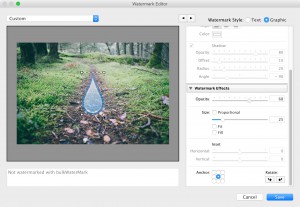
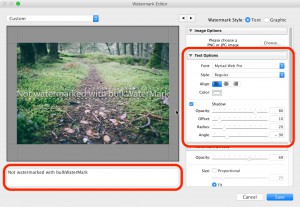
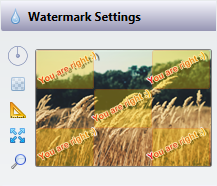
For text watermarks you can additionally set font, color and the text itself of course and also render a nice drop shadow effect. Both watermark styles enable the Watermark Effects section: Watermark Effects can be defined for each watermark (also known as layer group). You can define the opacity, size, margin, angle and position of the watermark, so this section is the equivalent for bulkWaterMark’s Watermark Settings:
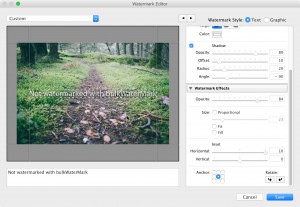
Lightroom allows you to scale a watermark proportional to the image size similar to the percentage layer size feature in bulkWaterMark and fit it into the picture by the defined inset. I prefer using the “Fit” option and setting the inset afterwards, because Lightroom displays helpful reference lines that illustrate the margin as depicted here:
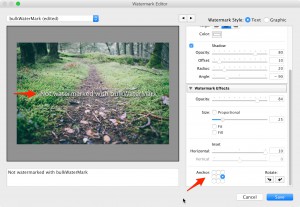
You can also set an anchor for the watermark to position it, but you are limited to a single selection. Also a tile mode is missing that allows you to distribute your watermark over the complete photo.
If you are satisfied with your settings, you can close the dialog by clicking the Save button. Lightroom asks you for a preset name and after entering it you are back on the export dialog where the Export button awaits your final click to watermark photos.
Conclusion
So you have seen that watermarking in Lightroom works out pretty well. The configuration of the watermark is not always smooth, but on the whole very handy. It is integrated nicely in the export workflow of the application and also delivers good results. In comparison to our Photoshop tutorial the steps to create and setup our watermark are less complex and Lightroom is way faster in applying the watermarks on your pictures.
When comparing side by side with bulkWaterMark, Lightroom lacks of many key features that bulkWaterMark supports out of the box. Lightroom does not support variables within a text watermark to display Exif information for example. Also the positioning of the watermark is not as flexible as in bulkWaterMark where you can set multiple anchors and tile watermarks. In Lightroom you can use the drop shadow effect only on text watermarks, whereat bulkWaterMark allows you to use drop shadows on image or text watermarks and supports even more Photoshop-esque blending effects like glow, bevel, stroke or mirroring.
The big news at the end: We really like Lightroom as a professional app for organizing and editing photos, but we would love it even more if the watermark photos tool would support pro features too. Therefore we have a free Lightroom PlugIn in our roadmap for 2016 that lets you use bulkWaterMark within the Export workflow of Adobe Lightroom. 🙂
I hope my tutorial was helpful to you!
Cheers,
Phil
PS: Again for this tutorial: If you have another 2 and a half minutes, I would like you to invite you to watch how you can watermark photos even better with bulkWaterMark:
