You are using PMlabs waterMark V2 already, so why should you switch to the brand new and commercial PMlabs bulkWaterMark?
Since the release of waterMark V2, not only technology behind the software has changed, also my programming skills. waterMark V1 was first released in 2003, V2 followed 2005 and waterMark V3 aka bulkWaterMark has seen the light in late 2015. So what does bulkWaterMark batch watermarking photos better than its predecessors? Let’s take a look… 🙂
1. Better user experience for your daily image protection routine
We thought a lot about how to improve the user experience of waterMark V2. Like V1, the V2 had a similar interface for configuring the batch watermarking. Opening or defining the watermark and its position, setting an output format and folder, adding files to the batch run and finally hit the button to start watermarking your photos. Simple, but somehow not really self-explanatory.
I have often heard that people were overwhelmed when seeing waterMark V2 the first time in all its glory. For me as developer of the software, the workflow was clear, but for users not. Therefore, we redesigned the UI mechanics of bulkWaterMark for configuring the batch watermarking of photos.
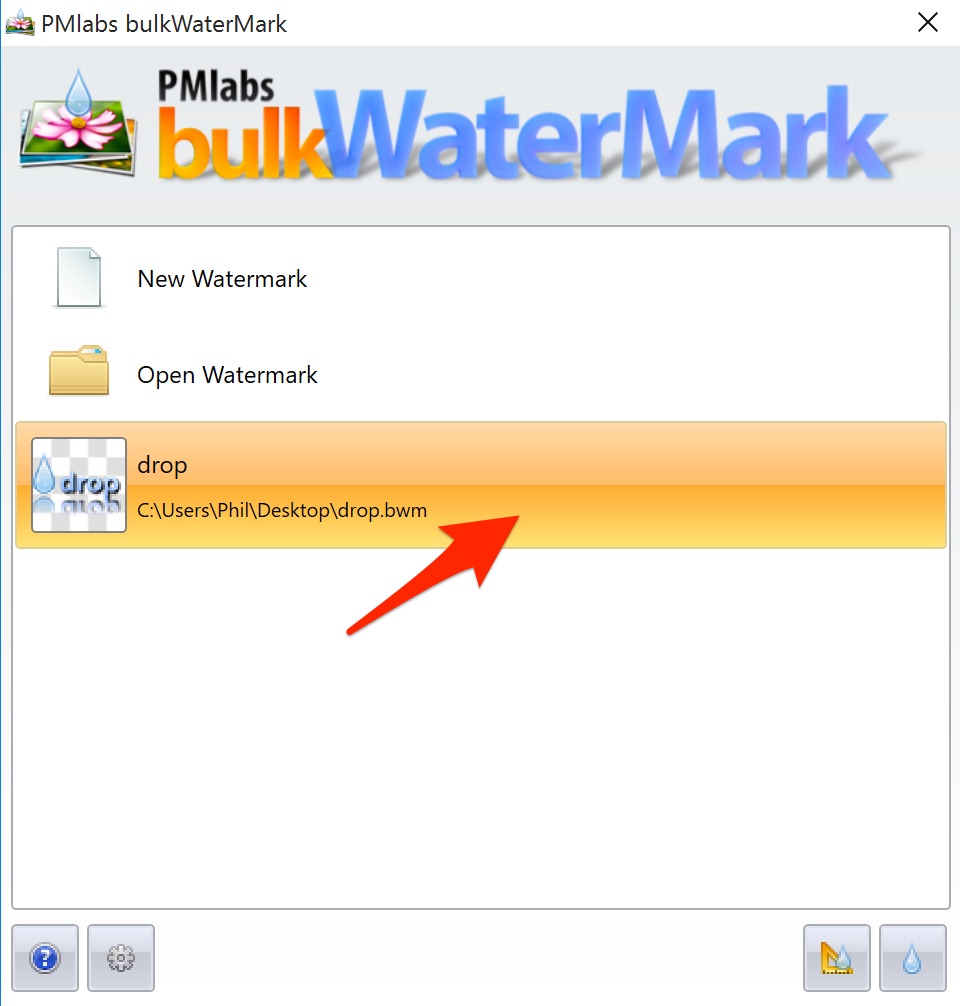
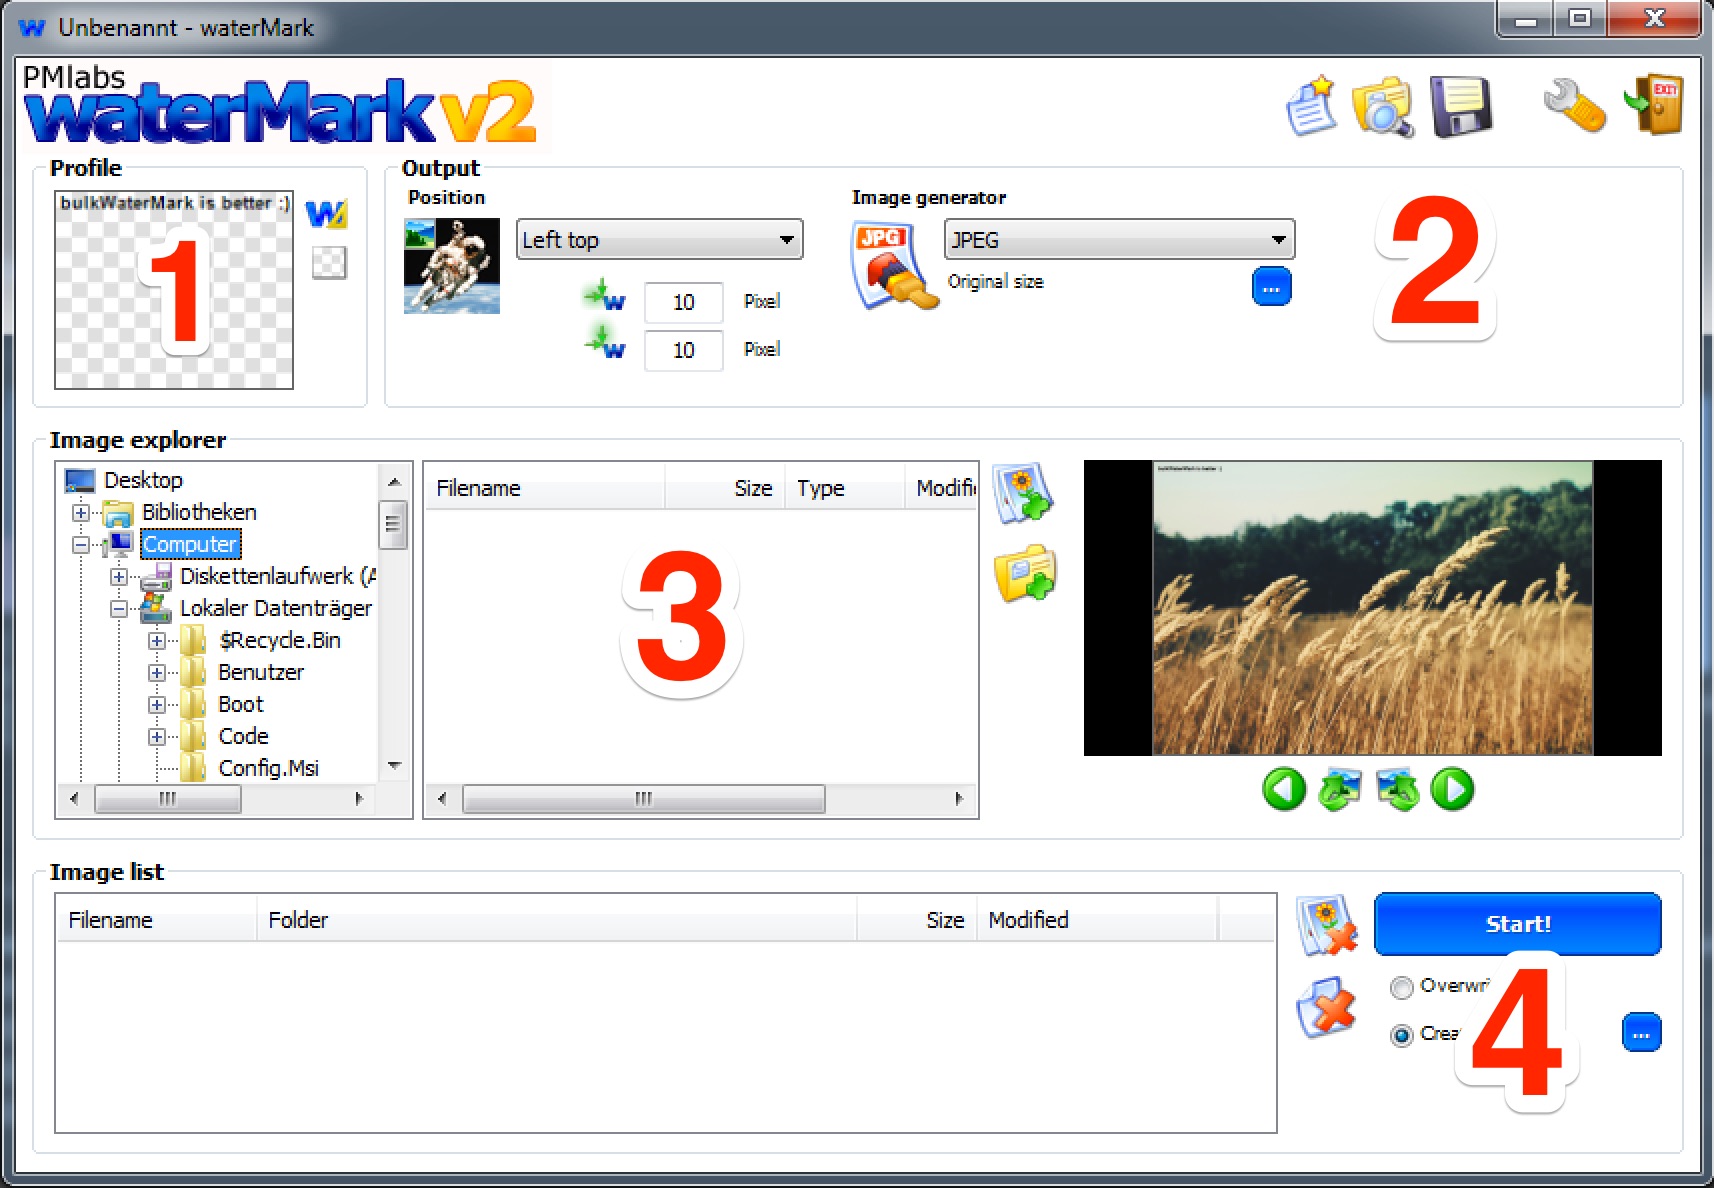
bulkWaterMark welcomes you with a start view that lists all recently used watermarks. To use one of these watermarks to batch watermarking your photos, just double-click them. If you want to create a new watermark, double-click the first entry and the profile editor opens. By double-clicking the second entry of the list, you can open a watermark that is not in your list yet or has been saved on a different computer.
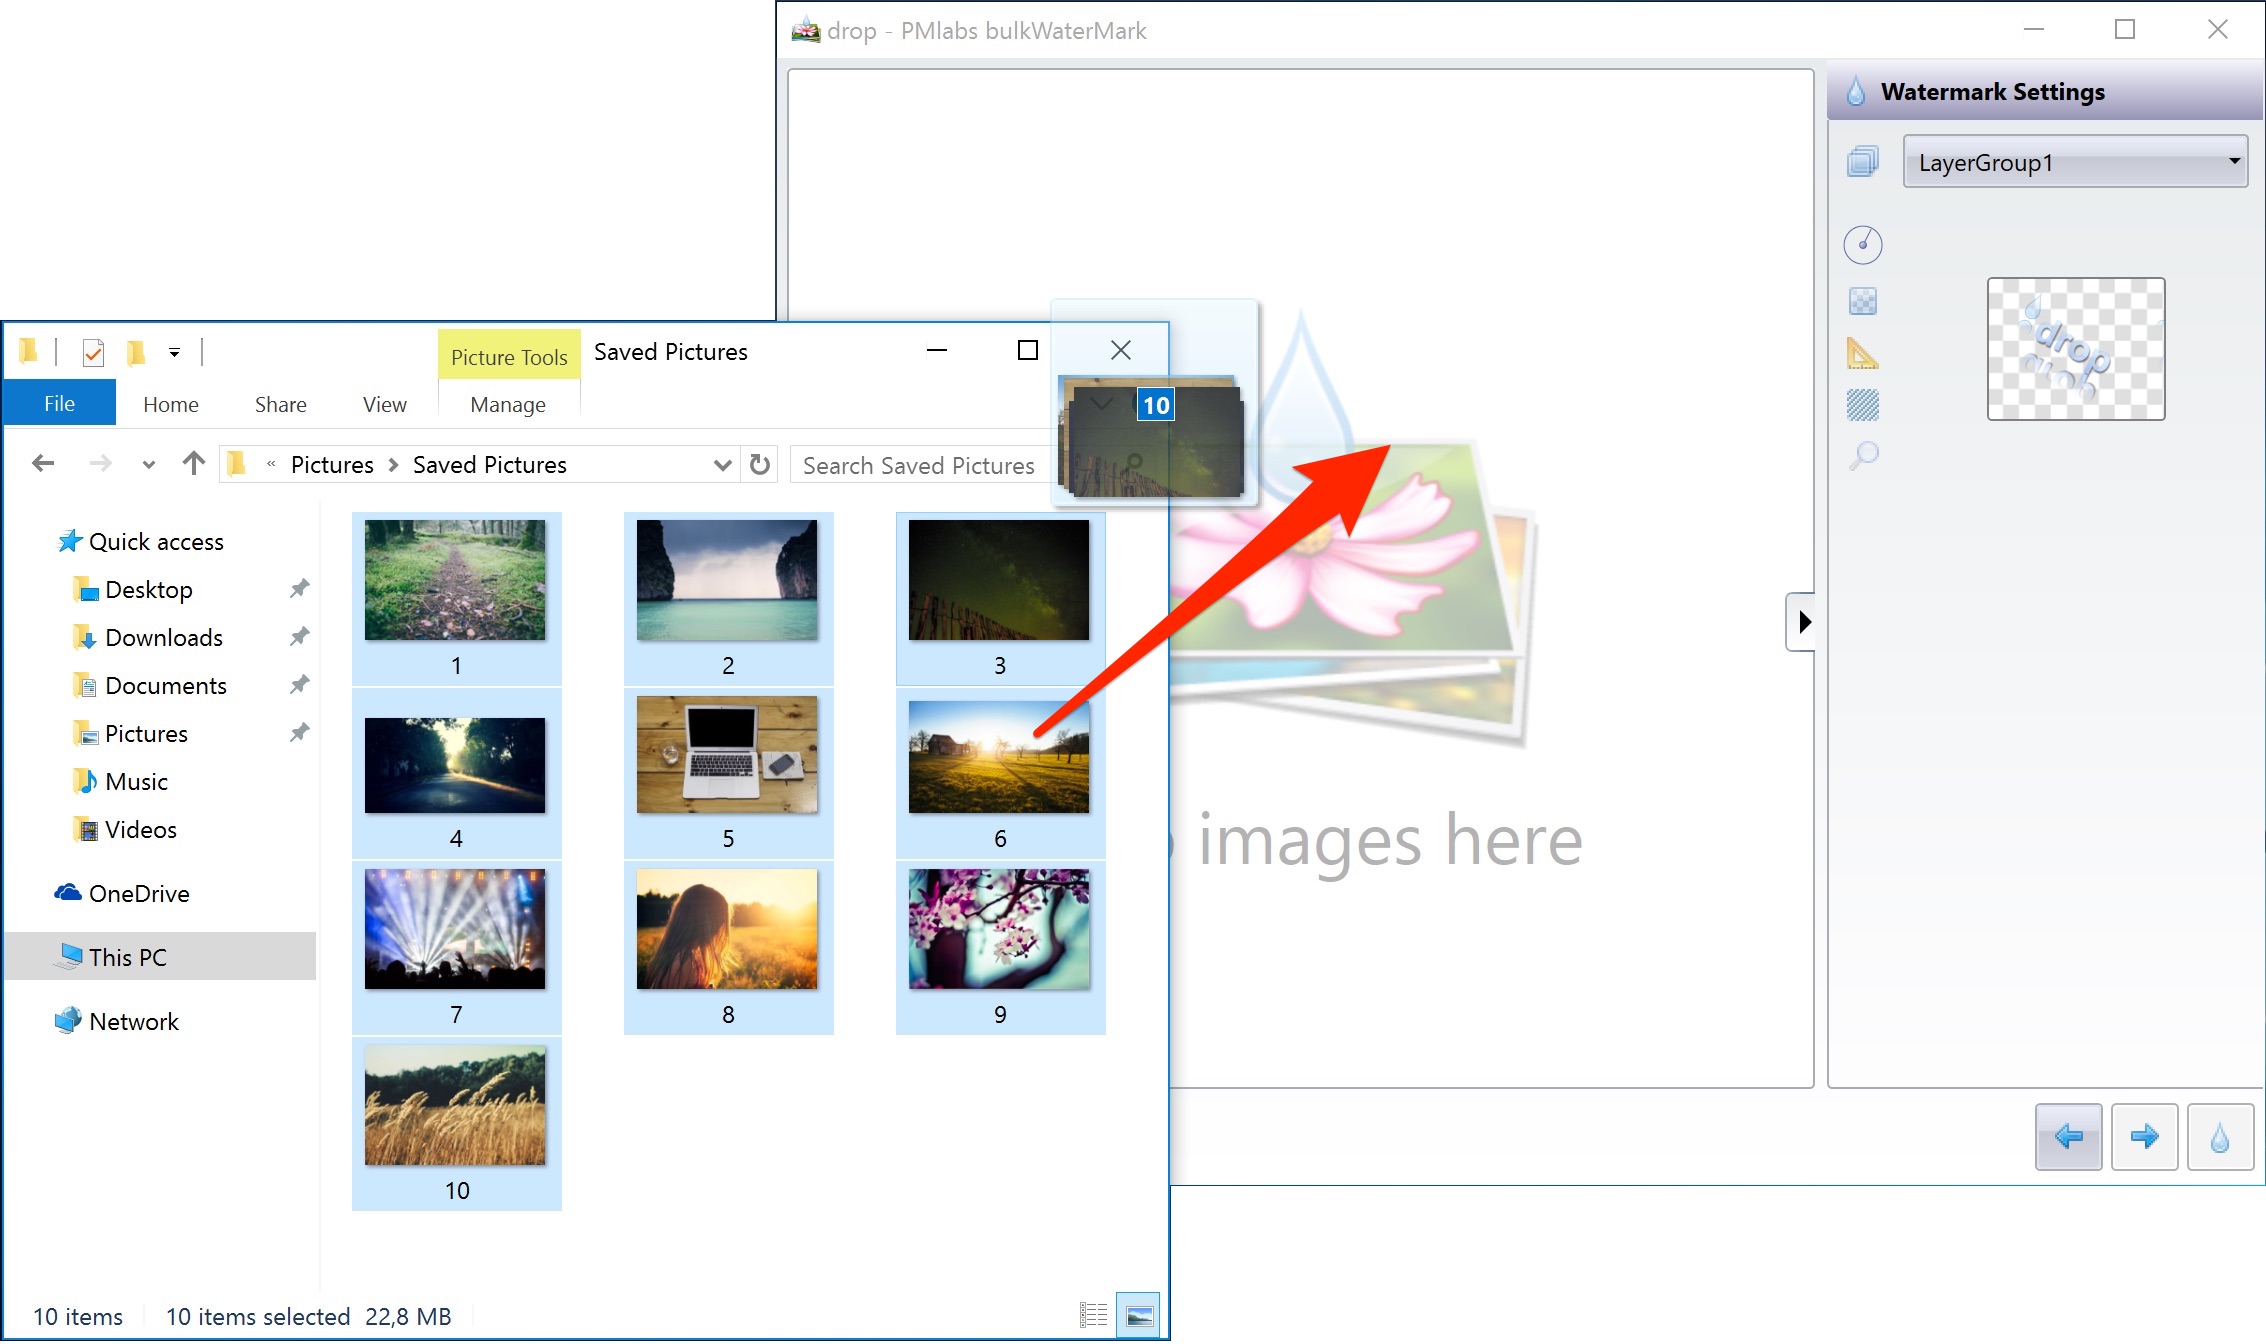
Afterwards the photo batch list view awaits your pictures to be dragged into the list. Just drag the image files or folders you would like to get watermarked from the Windows Explorer and drop them onto bulkWaterMark’s batch list. As soon as bulkWaterMark has some files to play with, you can check if the watermark looks good on the images without modifying the original files. Simply click a photo to get a preview. If everything is looking alright, then start the fast bulk watermarking by clicking the drop button. The app asks you politely where to save the protected files and tries to match the output file format with the input file type. Otherwise you can follow the wizard to change output settings like target folder, resizing, renaming and image format converting.
We know that this is probably the most significant UX change since waterMark V2 and also a few people have already told us that they are missing the old Explorer-style folder tree view and file list to browse within the application directly. Most users however, really like the drag and drop approach we are using here, since the user interface is more structured and less crowded now. The output settings are now optional for display, because once you have setup your profile, you will probably never ever need to change the output settings again. So your future workflow for watermarking pictures with bulkWaterMark is only consisting of three tasks anymore: Choose your profile, drag and drop your photos and click the drop! 🙂
2. Overhauled profile editor to design fresh and dynamic watermarks
While waterMark V2 already allowed to create watermarks in WYSIWYG (What You See Is What You Get) style with layers like Photoshop, its profile editor had some limitations. Some examples: Layer rotation was not possible in V2 and if you wanted to add a new text watermark to your images, a new window appeared where you can edit the layer’s display text.
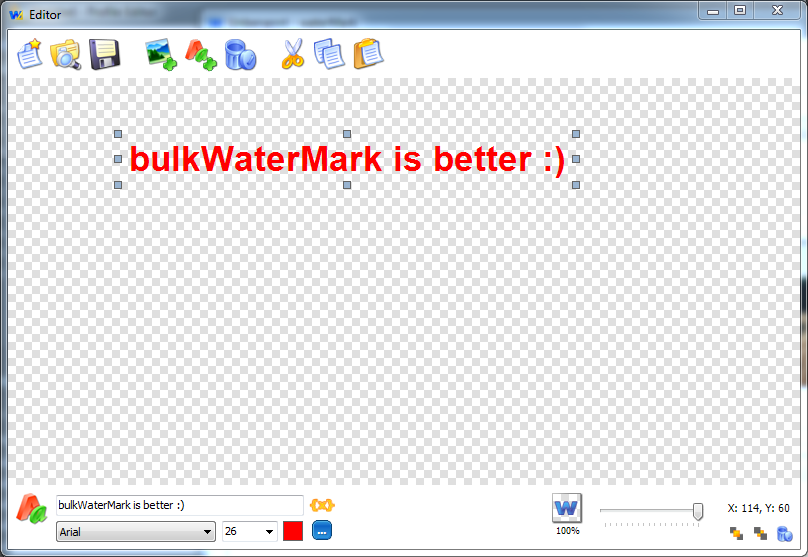
In bulkWaterMark you can now type directly your text layers and rotate or resize them via mouse. If you are accidentally deleting a layer, bulkWaterMark will fix that by offering you an undo of the fatal action. This and a lot of other features can now be controlled more smooth and natural as you would expect it from an image editing software. Tiny tweaks like previews of each available font (you can set for your text watermark when selecting the font family) are making the user experience perfect. Besides these UI improvements, there are also a ton of real new watermarking-relevant features that can be enabled within the new profile editor.
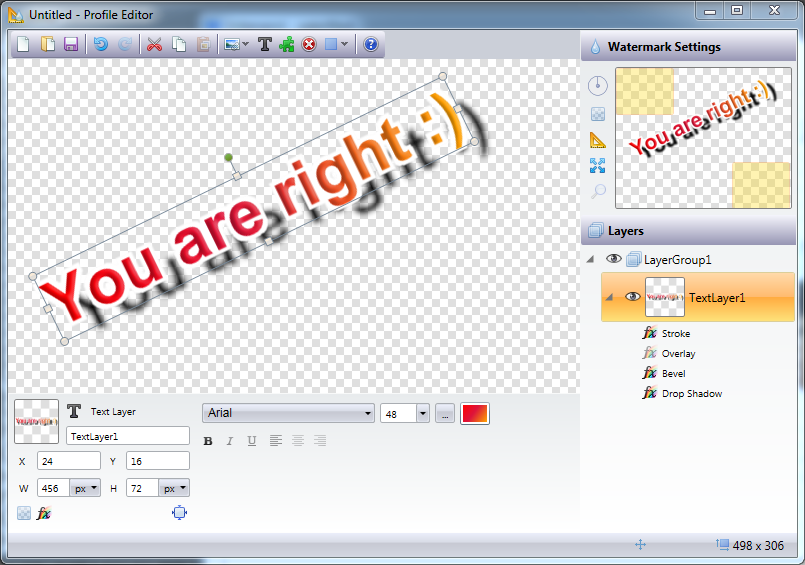
The bulkWaterMark screenshot above shows some of the new features: For example, you can see the new gradient color brush that is available for all layer color selections in your watermark. In the watermark above I used the colors red, crimson and gold to compose the gradient.
Also, the text layer of the watermark is rotated – a new feature for layers and layer groups in bulkWaterMark. Wait, layer groups? Yep, that’s also new. Layer groups are surprisingly a group of layers and stand for a watermark. So you now can apply multiple watermarks on a photo by defining multiple layer groups in bulkWaterMark’s watermark editor.

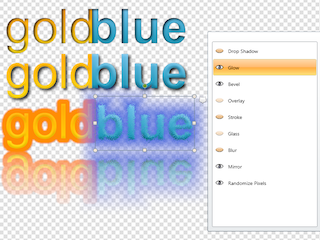
Another one: Blending effects. You can now have a soft drop shadow below your text or a thick stroke that surrounds each character. These effects can be combined and used for any type of layers, like image watermarks too.
Also neat: Live preview your watermark while editing it. Just drag and drop an image file onto the preview of the profile editor and the picture gets previewed with the watermarks that are on your canvas.
Within the live preview, you can toggle the watermark position for each layer group and stamp a watermark multiple times in a picture in bulkWaterMark. And of course, we also added the often requested tile watermark mode to bulkWaterMark:
So you see: Upgrading to bulkWaterMark is already worth it! 😉 But wait for another few reasons… 🙂
3. Extendability!
bulkWaterMark is extendible by using PlugIns. In the next few month we will ship free PlugIns to provide more options for creating new watermarks, developing your own custom expressions for text watermarks or including new image formats for import and export. A social export PlugIn is also in the pipeline to support watermarked image upload for Facebook, Flickr and WordPress.
We will also release our PlugIn SDK as mentioned a few weeks ago. In the meantime we are fine tuning and optimizing all the interfaces and setting up the documentation.
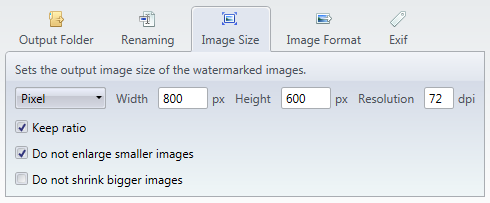
4. New batch resizing and renaming options
For bulkWaterMark we also did some fine tuning regarding resizing and renaming options. For resizing we added the possibility to set the resolution of the file in dpi and also implemented two flags to avoid enlarging smaller images or shrink bigger images. This is useful if you have a lot of high resolution photos in your batch list that need to be sized down to 800 x 600 pixels, mixed with some small pictures that are only at 640 x 600 for example. bulkWaterMark will watermark the small pictures too then, but will not resize them to 800 x 600 pixels, because the original size is smaller.
Also renaming is now more clever than in waterMark V2: You can now dynamically build a renaming pattern in bulkWaterMark with properties from the input file like the original filename or output size:
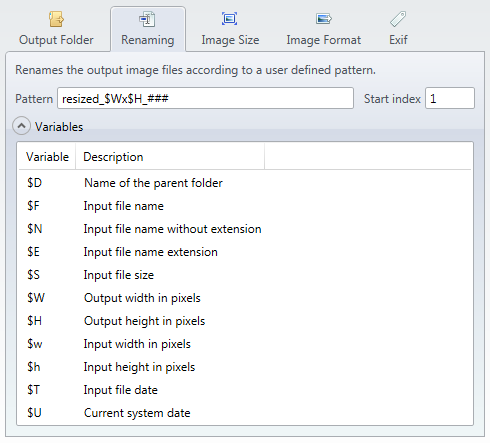
In the screenshot above I am defining the renaming pattern “resized_$Wx$H_###”. When using typical photo taken by a digital camera or smartphone, the filename is probably something like “DSC_1232.jpg”. If this is the fifth image in your batch list and the image is 2500 x 1667 pixels, then this will result in the output filename “resized_2500x1667_005.jpg”.
5. Dynamic Expressions reloaded
bulkWaterMark brings also major improvements for users of expressions. Expressions can be used in text watermarks to display input or output image metadata. While waterMark V2 had just a simple find and replace mechanism to detect variables and replace them with metadata, bulkWaterMark parses and analyzes a text watermark’s content and offers completely new possibilities by parameterizing expressions, nesting their results or using logical conditions to control their output. And: Expressions can also be used in other watermark types. In image watermarks you can specify the image filename by using an expression. The following example shows how to use an image to illustrate that the watermarked picture was shot with flash:
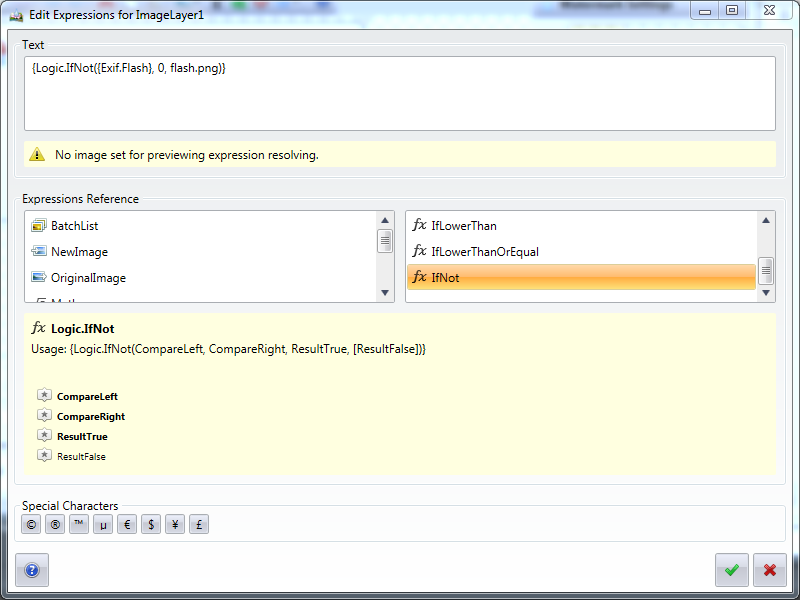
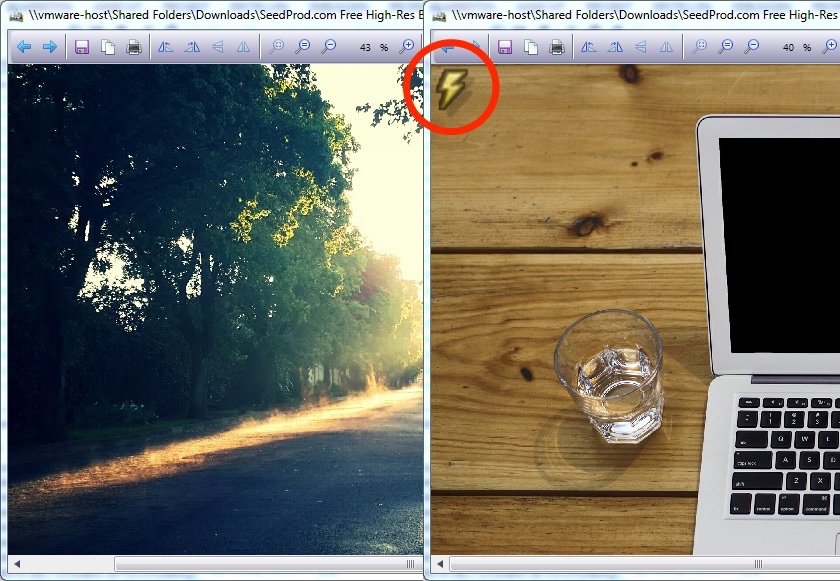
When using the above expression and your input photo was shot with an Exif-capable camera, bulkWaterMark reads the Exif tag Flash first. If the value of the tag does not equal 0, the photo was shot by using a flash. In this case the expression returns the string “flash.png”. bulkWaterMark uses this resolved value as image watermark filename and stamps it into the photo, but only if the Exif tag is not 0:
Expression features are fully available in every version of bulkWaterMark, including PlugIn support. More in-depth details on the topic expressions will follow in the next few weeks in our blog!
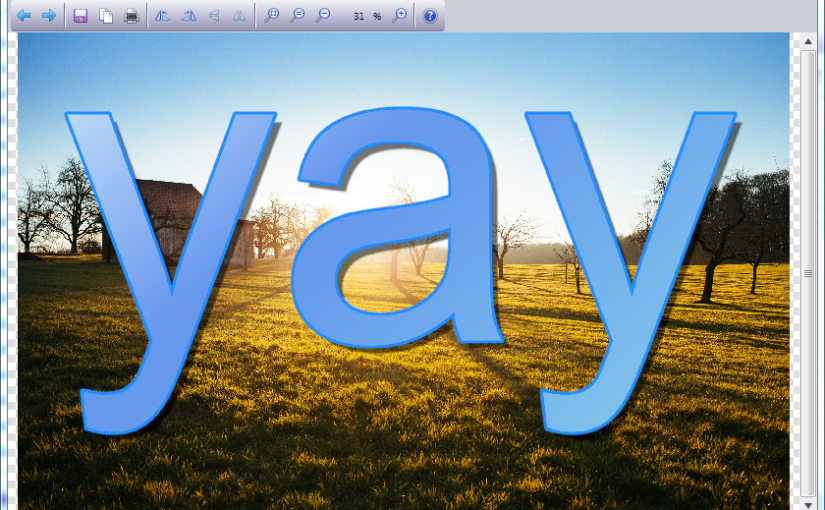
6. Auto-scalable vectorized watermarks
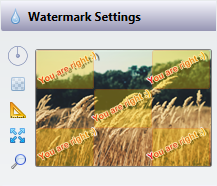
Another important new feature of bulkWaterMark is auto-scaling watermarks according to the input image size. Sometimes you have different image sizes to watermark within a single batch run and want to display a watermark always in the center of the photo for example. With bulkWaterMark, this is no problem anymore:
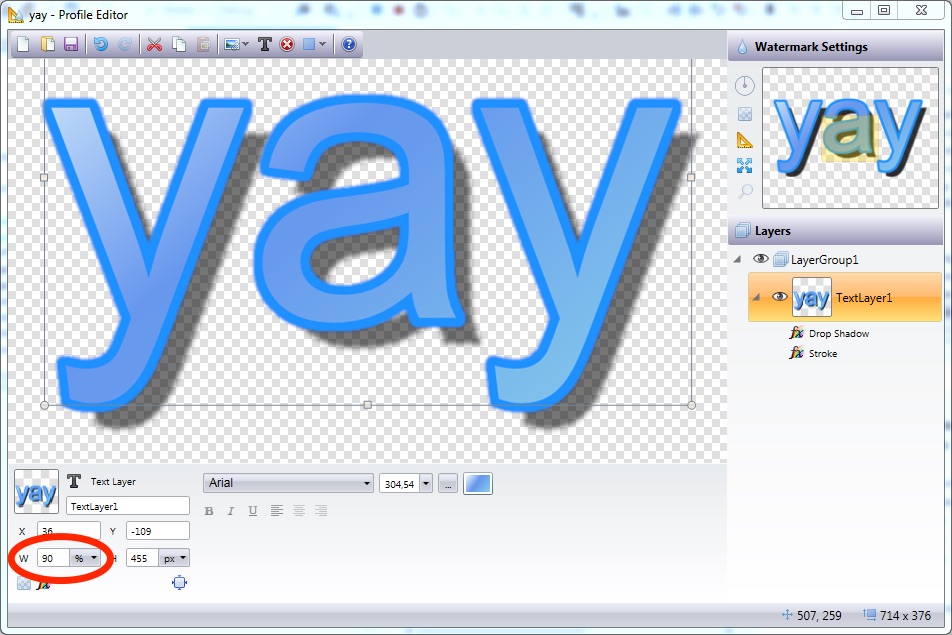
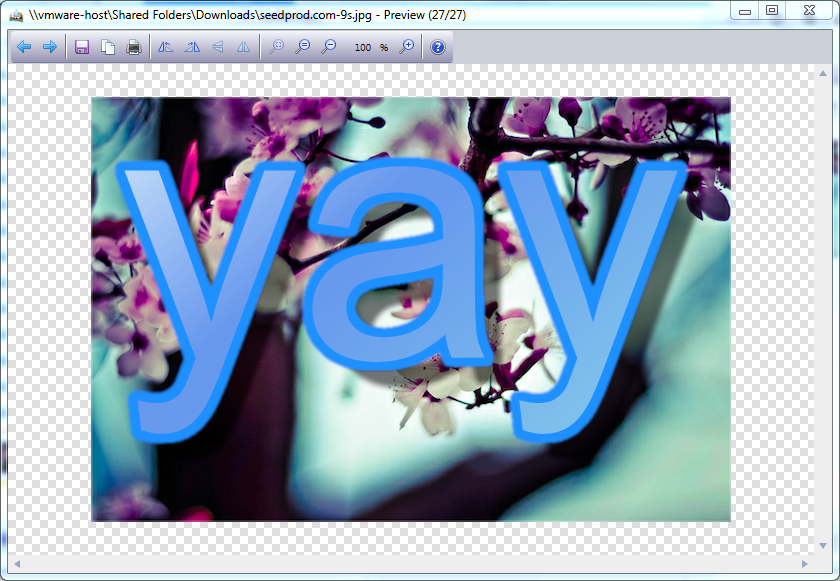
As you can see, bulkWaterMark always scales the text watermark that it measures 90 percent of the photo to watermark. This feature works best when centering watermarks horizontal. It guarantees high-res watermarks on high-res photos:
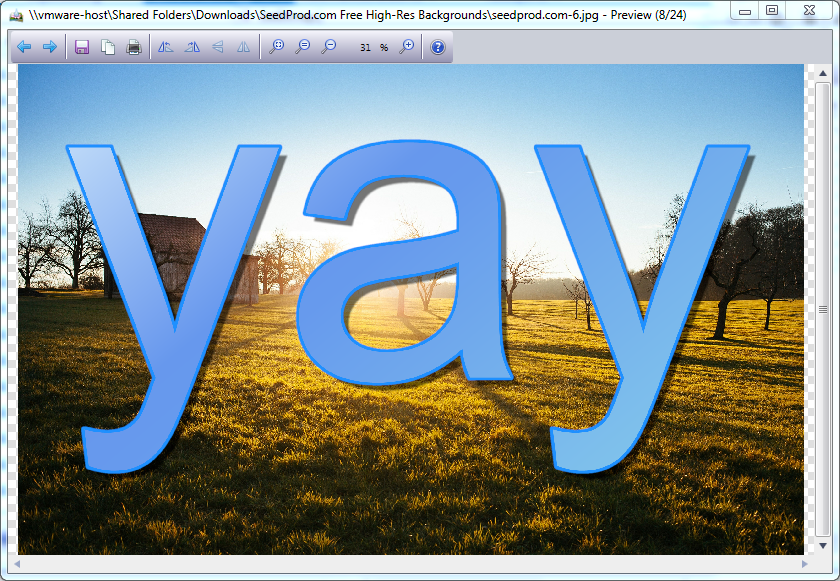
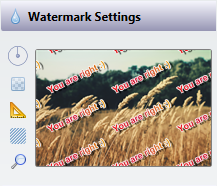
You also can apply it on normal photos. bulkWaterMark chooses the right font size according to the image size automatically:
Conclusion
So you have seen that bulkWaterMark does indeed rock more than waterMark V2. It’s a lot more, also compared to paid alternatives. We hope you are enjoying the new features and tools that are packed with bulkWaterMark for protecting your photos with watermarks. Please keep in mind, that we still have a lot of ideas for future releases and PlugIns for 2016.
Stay tuned and watch out for a more detailed write-up about our new dynamic expressions in bulkWaterMark!
Happy holidays!
Phil


