There are many ways of adding watermarks to your images. So why should you use PMlabs bulkWaterMark or other similar batch photo tools instead of the free Gimp or the industry standard Photoshop? Even professional photo tools like Adobe Lightroom do watermarking, but in a very basic way compared to bulkWaterMark. The following series in our blog covers different approaches on how to watermark photos and shows you the pros and cons of several software solutions.
Our first test candidate is Adobe Photoshop. Photoshop is the world’s most popular and powerful image editor. Most users do not know about Photoshop’s batch capabilities, but its image operation features can be used for multiple files in a batch too. To get photos watermarked in a bulk operation, try out the following step-by-step guide. Note that our tutorial is done with Photoshop CC 2015 on a Mac, but shortcuts and user interface are nearly identical in Windows and the guide will also work for older versions.
Recording an Action to watermark photos
Photoshop has a nice feature called Actions. Most of you have probably used the Macro Recorder in Microsoft Office Products like Excel or Word to automate steps that you are doing often in your spreadsheets and documents. Actions are the counterpart of Macros in Photoshop to automate your image processing tasks. We will record now such an action to batch watermark photos.
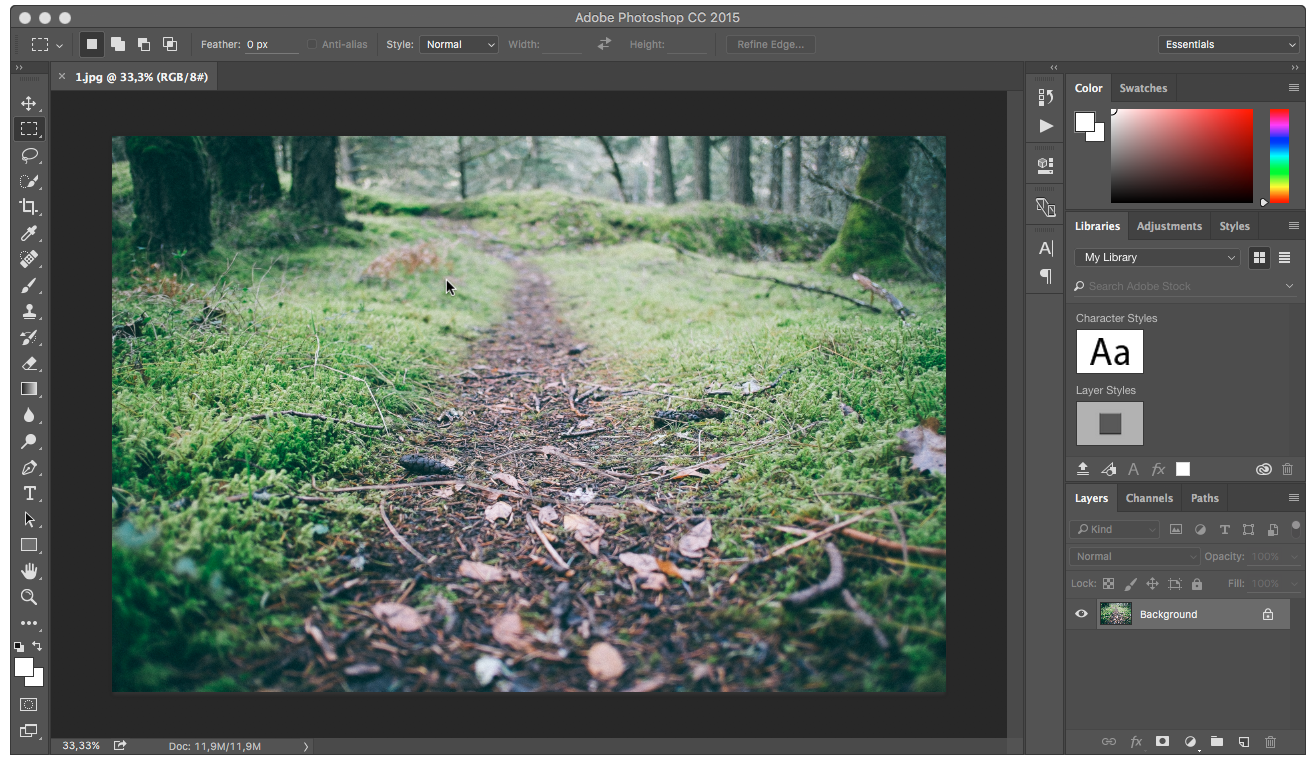
For creating your Watermark Action in Photoshop (or profile as we call it in bulkWaterMark), I suggest to load one of the pictures you would like to watermark into Photoshop.
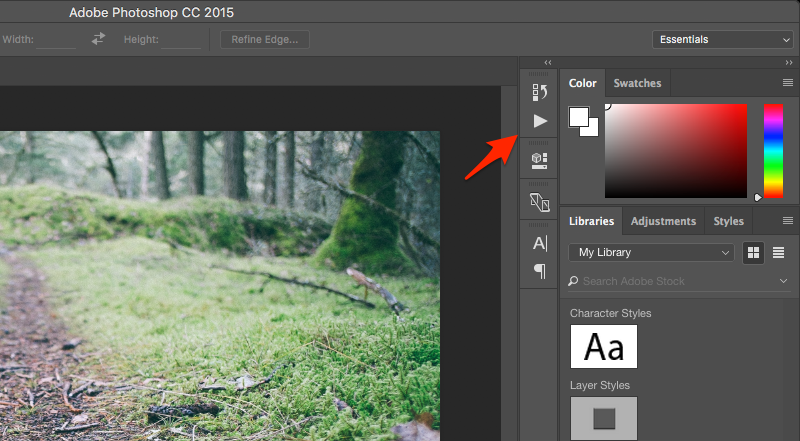
Afterwards, click on the Actions button in the vertical toolbar on the right side of your Photoshop window. By default, this button is not displayed. To display the button, open the menu item Window and click the entry Actions.
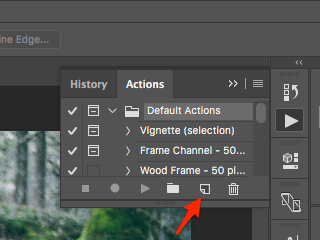
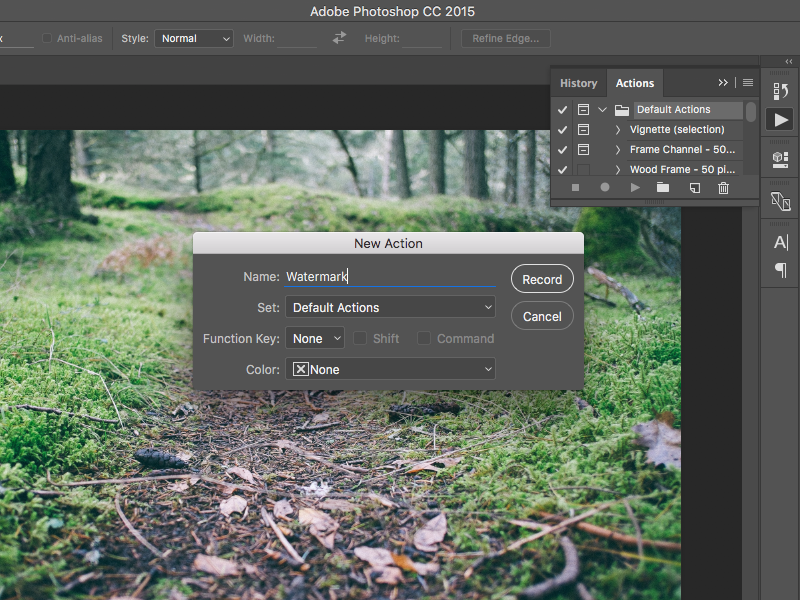
In the Actions Window click the New Action button to create your new Watermark Action:
Straight afterwards, define the name of the new Action and click Record:
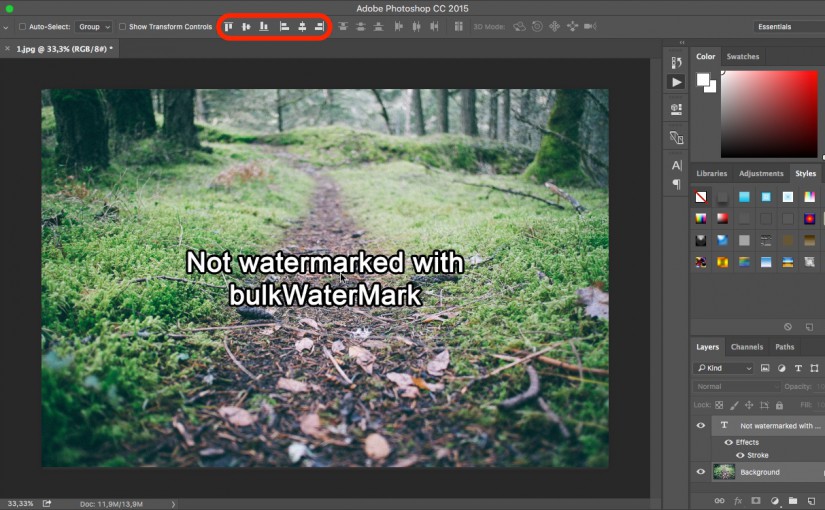
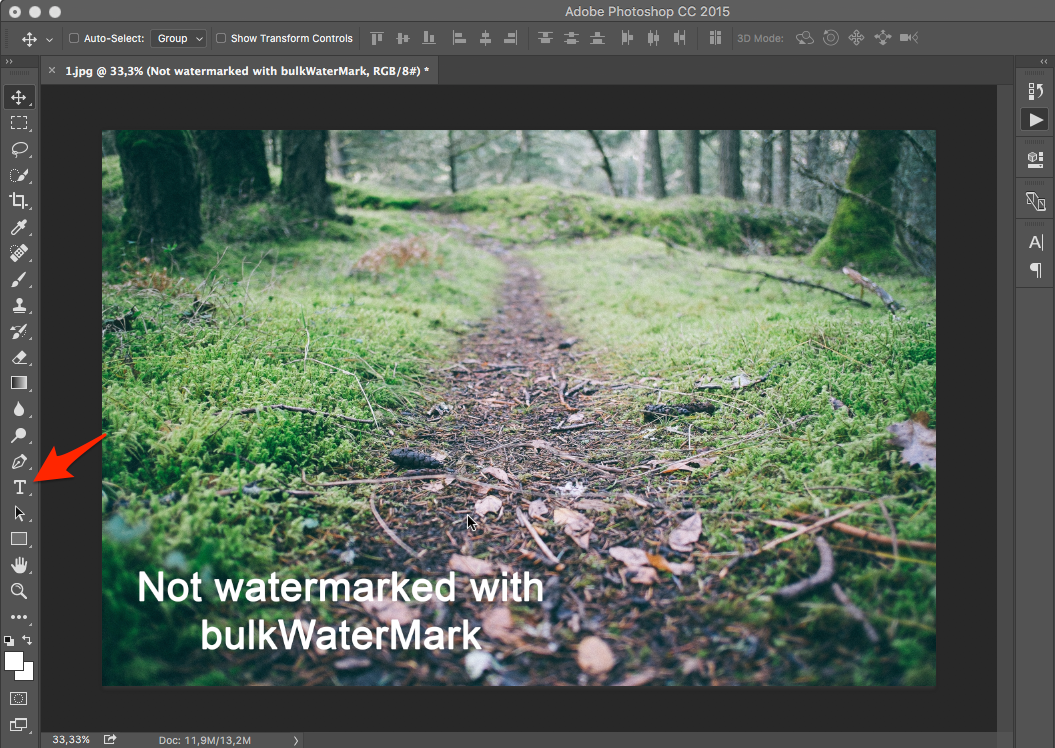
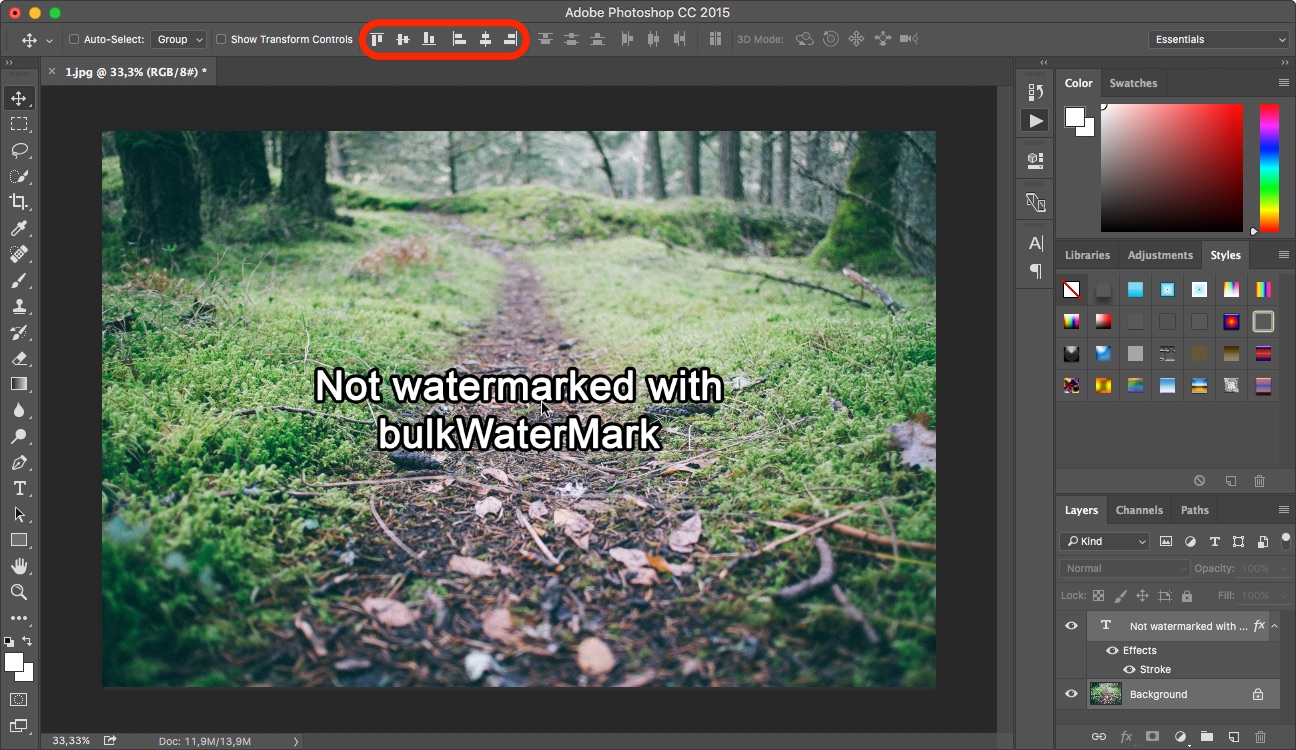
Now it’s getting exciting: Photoshop is from now on recording all your actions. But do not panic, you do not have to hurry. It’s time to get creative now and design your watermark. To keep it simple and stupid, I’m using the Horizontal Type Tool of Photoshop to insert a text watermark by clicking anywhere on the picture. The glorious text my watermark is displaying is “Not watermarked with bulkWaterMark”.
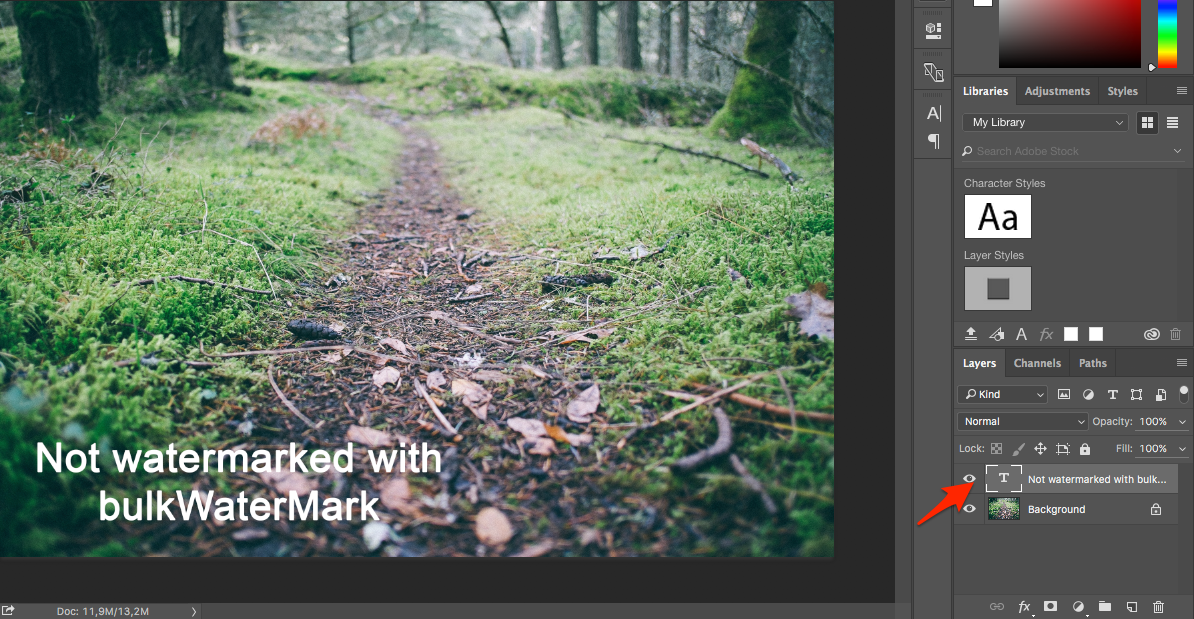
To make the looks of my text watermark more interesting, I’m using some of Photoshops layer blending effects, similar to the layer effects that bulkWaterMark features. You can access them by right clicking on the text watermark layer and select the menu item Blending Options.
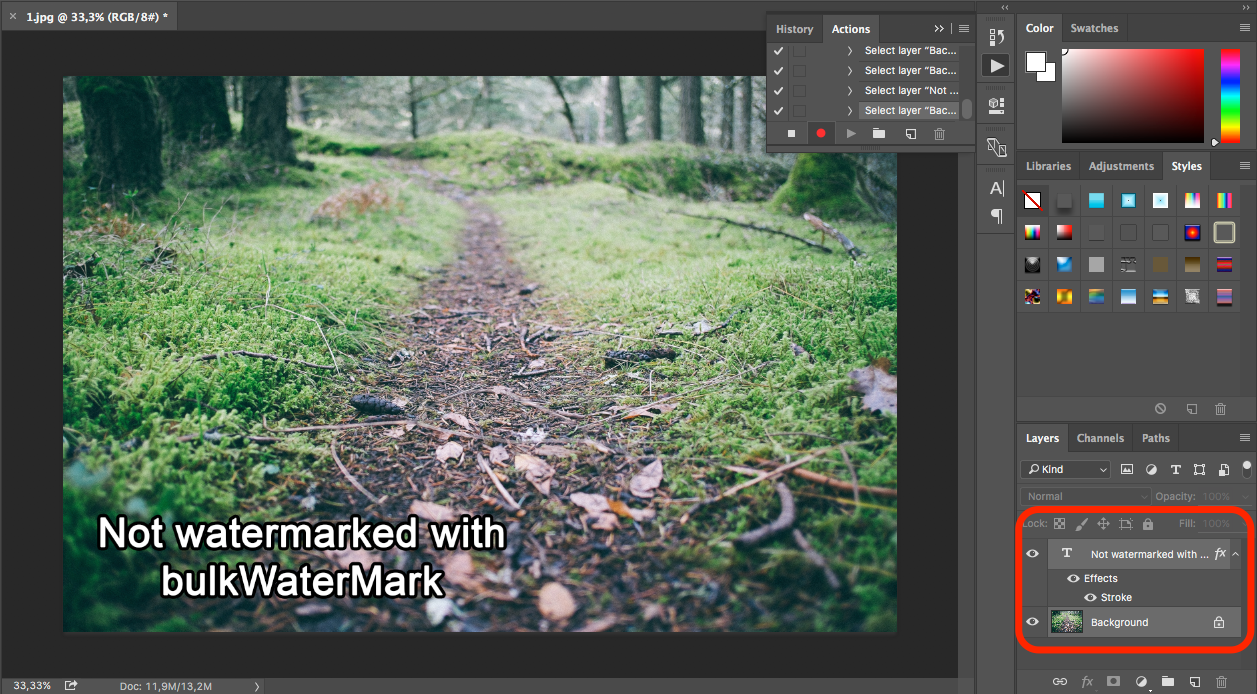
I’m adding a stroke blending effect to make my watermark appear stronger. You can try out the various effects to find a style that suits best for your watermark. Photoshop also brings some default styles for layers that can be activated in the Styles tab (to enabled click the Styles entry in the Window menu).
Now we need to align the watermark layer within the background layer. Therefore you need to select your watermark layer and the background layer by holding down the Control button on your keyboard (Mac: Command) and clicking the on both layers. This selection enables the Alignment buttons within the top tool bar. By using these buttons you can define how the watermark will be positioned on your photos:
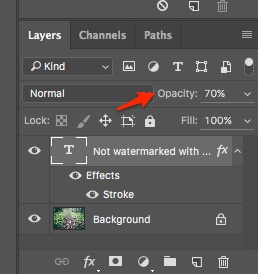
And the final tweak for our watermark: Transparency. To change the alpha value of the text layer, just select the layer and set the value as you like.
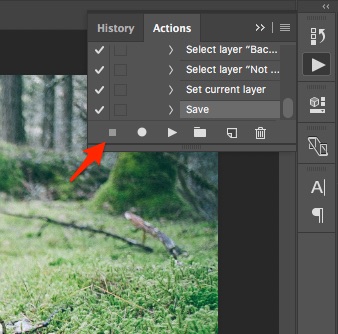
Now you have recorded the creation and styling of the text layer as an Action. The last step that needs to be recorded is saving the image. Use the File menu and click its entry Save As to save the image under any name and file format like JPEG or PNG for example.
After saving the image, stop the recorder:
Starting the batch operation and applying the watermarks
It’s a wrap! Time to replay what we have recorded: Let’s batch watermark our photos! The File menu’s Automate/Batch menu entry leads us to a new dialog that lets you select an Action to replay for our batch job.

In the Play section of the dialog, Photoshop automatically selects our new Watermark Action. In the Source section, select Folder as batch source and choose the folder where your images you like to watermark are located.
Next is the Destination section: Define your destination folder where to save the watermarked pictures. Tick the check box that says “Override Action Save As Commands” also. This overrides the filename you have chosen when recording the Action and makes use of the following settings:
In the File Naming section you can define the naming of the output files. By default, Photoshop uses the original input image’s name and the extension of your output format.
When you are fine with your batch configuration click ok and lean back… 😉
Conclusion
We cannot deny that Photoshop is a kind of a blueprint for some features of bulkWaterMark. Photoshop is powerful and can be used for anything concerning image processing. But what does bulkWaterMark better?
When trying out the Photoshop Action, you will realize that running batch operations with Photoshop is not that fast. If you are working with thousands of photos, bulkWaterMark will protect your images much faster than Photoshop, since Photoshop replays the individual steps of an Action for every single picture. You will see every recorded step over and over again for each image. All layers and effects get recreated and re-rendered, while bulkWaterMark does this initially or only when it is necessary.
Also, bulkWaterMark supports auto-scaling of watermarks that are too big for your photos. Furthermore, it automatically adjusts the size of a watermark proportionally, so that you can use a text layer as watermark that is 10 percent of the input photo’s width for example.
While Photoshop can do any image processing purposes in general, bulkWaterMark brings a lot of features that are really important to batch watermark photos that Photoshop does not offer. bulkWaterMark’s expressions are a unique and functional addition that allow scriptable content for text layers like displaying Exif metadata for example. Also the batch image resizing and renaming features are more versatile and tailor-made for batch watermarking.
bulkWaterMark is simply designed for doing fast, complex and stunning batch operations with your pictures. Its philosophy is streamlined and the wizard-driven workflow is less complex and more focused on protecting your images with watermarks. Once you created a watermark profile of your needs, you can just drag the photos into bulkWaterMark, drop them and forget about the rest. But don’t forget to pick up the protected photos in your destination folder… 😉
Hope you liked my tutorial!
Cheers,
Phil
PS: If you have another 2 and a half minutes, I would like you to invite you to watch our video tutorial on how you can do the above job with bulkWaterMark:


